Table of Contents
ToggleBathroom flooring sets the tone for your entire space, it needs to look good, handle moisture without complaint, and survive daily foot traffic. Choosing the right bathroom tile flooring can feel overwhelming with so many options on the market today, from sleek porcelain to rustic natural stone. Whether you’re tackling a full renovation or refreshing a tired floor, understanding the strengths and limitations of each material type helps you make a choice you won’t regret. This guide walks you through today’s most practical and visually compelling bathroom tile flooring ideas, so you can plan a renovation that balances style with real-world durability.
Key Takeaways
- Porcelain and glazed ceramic are the most practical bathroom tile flooring options, offering water resistance, durability, and low maintenance with a PEI rating of 3 or higher for floor use.
- Natural stone like slate and granite brings character and luxury but requires professional installation, regular sealing every 1-3 years, and ongoing maintenance to prevent etching and water damage.
- Large-format tiles (24×24 inches and bigger) create a modern, spacious aesthetic with fewer grout lines but demand a perfectly flat substrate and professional installation to prevent cracking.
- Creative patterns using encaustic tiles, herringbone layouts, or hexagonal designs add personality without overwhelming small bathrooms when used strategically as accents or borders.
- Proper substrate preparation with cement backer board, adequate slope toward the drain (1/8 inch per foot), and sealed grout lines are non-negotiable for preventing water damage and mold growth in bathroom flooring.
Classic Ceramic and Porcelain Tiles
Ceramic and porcelain remain the workhorses of bathroom flooring. Both are durable, water-resistant when properly sealed, and available in endless colors and finishes. The key difference: porcelain is fired at higher temperatures, making it denser and less porous than ceramic, which gives it a slight edge in wet environments.
Standard ceramic tiles run 12×12 inches or 18×18 inches, though smaller subway-style rectangles (3×6 or 4×8 inches) and hexagons are trending again. Nominal dimensions are what manufacturers advertise: actual tiles are typically 1/16 inch smaller to account for grout lines. For bathrooms, aim for tiles rated for floor use (not wall-only) with a PEI rating of 3 or higher, which indicates resistance to abrasion.
Porcelain offers more color consistency and a wider range of finishes, glossy, matte, textured, and even stone-look options. A glazed finish is easier to clean: unglazed porcelain provides better slip resistance but requires more maintenance. Both materials are budget-friendly, especially compared to natural stone, and the installation process is straightforward for a confident DIYer with basic tiling experience.
Natural Stone and Slate Options
Natural stone, slate, granite, limestone, and marble, brings authentic character to a bathroom. Slate offers rich, earthy tones with a naturally cleft (rough) finish that’s slip-resistant even when wet. Granite is harder and more stain-resistant than marble, making it a better choice for high-traffic bathrooms. Marble is luxurious but porous and scratches easily, so it’s best reserved for low-traffic powder rooms or paired with professional sealing.
Stone tiles demand more upkeep. Limestone and marble etch when exposed to acidic cleaners: all natural stone should be sealed before installation and resealed every 1-3 years depending on traffic and exposure. Budget significantly more than ceramic for both material and installation, stone is heavier, requires reinforced substrate, and often demands a professional installer to ensure proper slope for drainage.
Designers share their favorite options that blend natural stone with porcelain accents for a balanced look. The layered aesthetic works well in transitional and modern bathrooms where you want warmth without the extreme maintenance burden of 100% stone flooring.
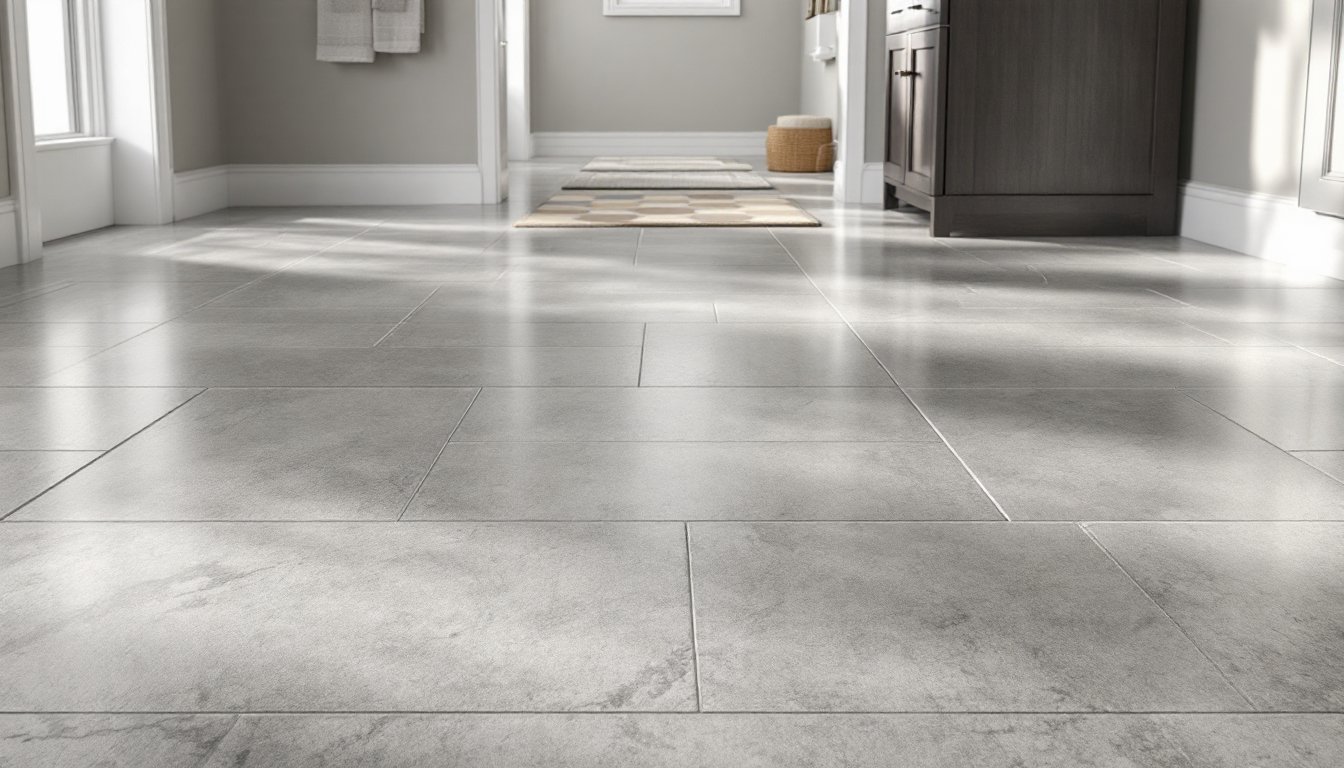
Modern Large-Format Tiles
Large-format tiles, 24×24 inches, 24×48 inches, or even bigger, have become a hallmark of contemporary bathrooms. Fewer grout lines mean a cleaner, more spacious visual, and they’re easier to clean and maintain. Modern porcelain performs beautifully in these sizes, and the slim-profile options available now are thinner and lighter than traditional tiles.
The tradeoff: large tiles are trickier to install. They require a perfectly flat substrate and careful attention to mortar coverage to prevent hollow spots and cracking. Most DIYers should call a professional for anything larger than 24×24 unless you’ve tiled extensively before. The substrate matters too: a poorly prepared floor or one with flex in the joists will telegraph movement to the tile surface.
Grout color is even more important with large tiles. Bright white grout can look stark: warm grays or even color-matched grout blends the lines seamlessly. Epoxy grout resists stains better than standard cement grout but requires more skill to install, another reason a professional install pays dividends on a high-cost tile investment.
Creative Patterns and Mosaic Designs
Pattern adds personality. Encaustic tiles (hand-painted with wax-resist patterns) create bohemian, boho-modern, and Moroccan-inspired looks. Subway tiles laid in herringbone or horizontal stack-bond break the monotony of straight grids. Hexagonal tiles in solid colors or mixed neutrals feel both playful and sophisticated.
Small-format mosaics and glass tiles work as accent borders or feature walls rather than full-floor coverage, glass especially can be slippery when wet, so reserve it for decorative bands or behind the vanity. Mixed materials (matte porcelain with glossy subway tile trim, or stone blended with porcelain) add visual interest without overwhelming a small bathroom.
The math gets finicky with patterns. Measure twice, lay out tiles in a dry run before committing to mortar, and cut edge tiles symmetrically so no row starts or ends with a sliver. Home design inspiration showcases how skilled renovators use pattern to add depth without clashing with wall and fixture finishes. Start with a clear vision, mock it up on graph paper, and don’t be afraid to step back and reassess before the adhesive sets.
Practical Tips for Choosing and Installing Bathroom Tiles
Durability and Water Resistance
All bathroom flooring must handle moisture. Porcelain and glazed ceramic are inherently water-resistant when sealed at grout lines and edges. Unsealed natural stone will absorb water and develop mold over time, so sealing is non-negotiable. Before purchase, confirm PEI ratings, the Porcelain Enamel Institute scale runs 1–5, with 3+ suitable for bathrooms, and 4–5 for commercial traffic.
The substrate underneath matters as much as the tile. Bathroom floors should rest on cement backer board (not drywall) installed over a solid subfloor. If you’re replacing existing tile, check for soft spots, mold, or water damage in the subfloor. A wet subfloor won’t grip new mortar, and trapped moisture will eventually fail the installation. Building codes require a vapor barrier between the slab or floor joists and the underlayment in most jurisdictions, verify local IRC (International Residential Code) requirements before starting.
Slope the floor toward the drain or a low corner at a minimum of 1/8 inch per foot. This prevents standing water and mold growth. If your current floor is flat, you may need to build up the slope with thinset mortar before laying tile, which adds complexity and cost.
Maintenance and Cleaning Considerations
Glazed ceramic and porcelain are the easiest to maintain, a damp mop and mild cleaner is all you need. Unglazed and textured finishes trap soap residue and mold spores: they require more frequent cleaning and the right brush to reach texture grooves. Natural stone needs pH-neutral or stone-specific cleaners: avoid vinegar and acidic solutions that etch the surface.
Grout is the weak link. Standard cement grout is porous and stains easily: seal it every 1-2 years or switch to epoxy or urethane grout on first install (both are more stain-resistant and water-proof but cost more and demand professional installation). Light-colored grout looks fresh but shows dirt: dark or warm grays are more forgiving in bathrooms with kids or heavy use.
For installation guidance, This Old House offers detailed step-by-step tutorials on tiling, substrate prep, and tools. If you’re a first-time tiler, start with a small bathroom or a simple pattern and hire a pro for complex layouts, large tiles, or structural concerns.