Table of Contents
ToggleA black fireplace surround commands attention in any room, it’s bold, versatile, and surprisingly easier to maintain than lighter finishes. Whether you’re drawn to sleek modern lines, rustic charm, or industrial edge, a black surround can anchor your living space and complement everything from minimalist décor to eclectic layered interiors. This guide walks you through seven proven design approaches and the practical steps to install or update your own black surround, regardless of your skill level.
Key Takeaways
- A black fireplace surround is bold, versatile, and easier to maintain than lighter finishes, working with everything from minimalist to eclectic design styles.
- Seven proven black fireplace surround designs—including minimalist paint, classic tile, shiplap, and industrial metal—offer options for every aesthetic and skill level.
- Proper surface prep is critical: use cement board or durock substrate, fill and sand smooth, and verify local building codes for heat clearance and non-combustible material requirements within 12″ of the firebox.
- Material acclimation matters: let stone, tile, wood, and metal sit in the installation space for 24–48 hours to prevent warping or expansion after installation.
- Pairing black surrounds with contrasting elements like white, natural wood, or light stone creates visual interest and prevents a heavy appearance while maintaining design cohesion.
- Most DIY black fireplace surround projects are achievable for motivated homeowners, though complex tile layouts, structural work, or concrete finishing may require professional installation.
Modern Minimalist Black Surround
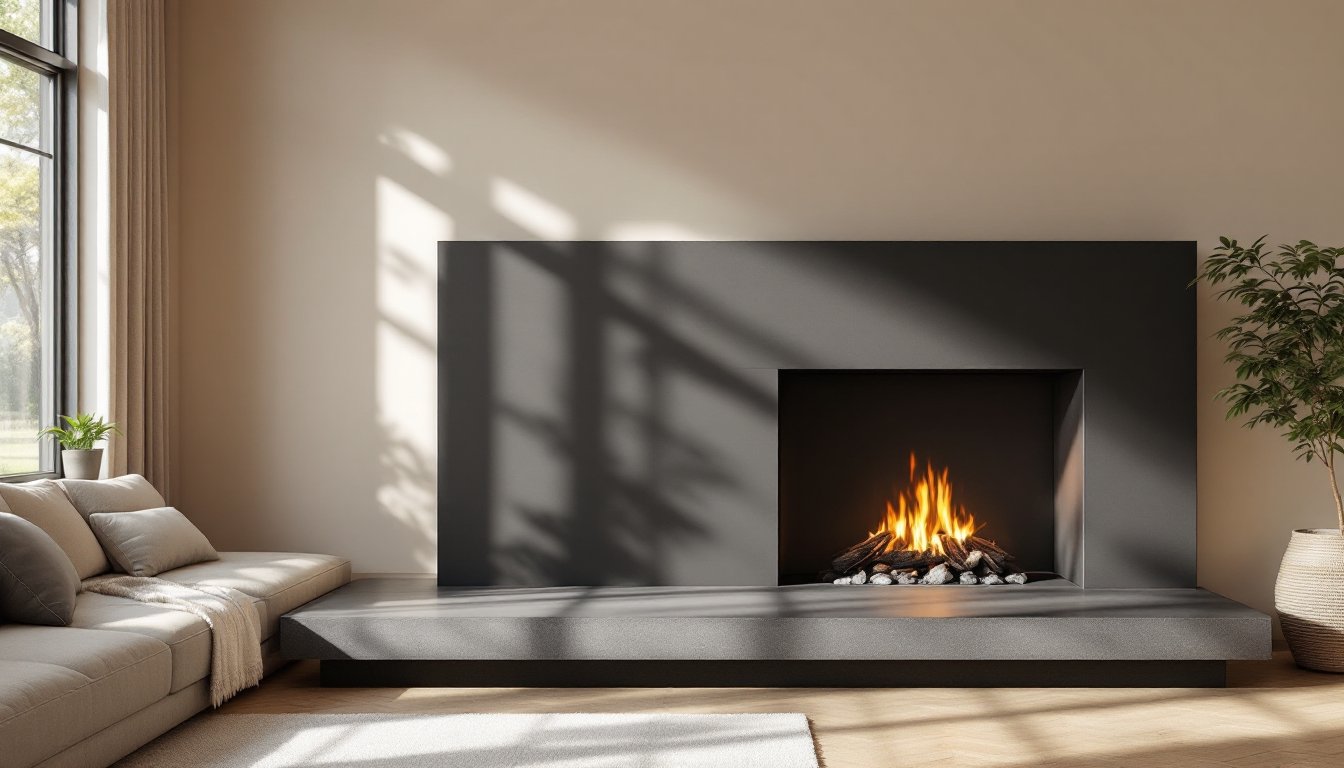
A sleek, flat black surround with clean lines strips away ornament and lets the fire itself be the focal point. This look pairs matte or satin-finish black paint, like an interior-grade latex or enamel with low VOCs, over a smooth substrate like drywall, cement board, or pre-finished black metal panels.
The key to nailing minimalist style is precision: every edge must be crisp, every surface perfectly flat. Prep work is critical here. Fill any gaps or holes in drywall with joint compound, sand smooth (120-grit, then 220-grit), and prime before painting. Two coats of quality black paint (aim for 98–100% black pigment) deliver a professional finish.
Consider adding a thin stainless steel or aluminum trim at the edges to define the perimeter without clutter. This 2–4 inch frame reads as architectural detail rather than decoration. Pair with a simple black hearth extension in concrete, slate, or black porcelain tile. Skip the mantel or keep it minimal, a single floating shelf in matching black or natural wood reinforces the aesthetic.
Classic Black Tile and Stone Designs
Tile and stone bring texture and permanence to a surround. Large-format black porcelain tiles (24″ × 48″ or similar) create an uncluttered look with fewer grout lines. Black marble, slate, or granite add luxury and warmth that pure paint cannot match.
Layout matters. Vertical stacking of oversized rectangles elongates the surround: running-bond (offset brick-like) pattern adds movement. Stick with a thin grout line (1/16″ to 1/8″) in dark gray or black epoxy-based grout to maintain visual continuity.
Installation requires a solid substrate, cement board or a membrane-backed durock board rated for wet environments, even if your fireplace doesn’t have direct moisture concerns. Use a modified-thin-set mortar suitable for your tile and substrate. Recent interior design trends increasingly favor black tile for its timeless appeal and practical durability. Mix matte and glossy finishes to subtly vary the surface without breaking the black theme. A single accent row in a complementary stone (charcoal, deep gray) adds sophistication without competing for attention.
Black Shiplap and Shaker Style Surrounds
Shiplap, those overlapping, tongue-and-groove boards, has become a classic surround choice, especially in farmhouse and transitional interiors. Paint it black and it reads as sophisticated rather than trendy. Use nominal 1″ × 6″ or 1″ × 8″ pine or cedar shiplap (actual dimensions: 3/4″ × 5.5″ or 7.5″). Pre-primed shiplap saves a step, but you’ll still apply two topcoats of black paint.
Installation over drywall requires a moisture barrier (like 15 lb. felt paper) directly behind the fireplace wall. Stud spacing should be 16″ on-center. Nail the shiplap perpendicular to studs, running horizontally from the hearth upward, using stainless or galvanized 2.5-inch finishing nails (trim-head nails reduce splitting). Leave a 1/4″ expansion gap at the top and sides to account for seasonal wood movement.
A Shaker-style frame, flat-panel wainscoting with a vertical-rail surround, pairs beautifully with black, especially in cottage or transitional homes. Build frame panels from 1″ × 4″ and 1″ × 6″ pine, assemble with pocket hole joinery or traditional mortise-and-tenon, then install as a wainscot around the firebox. Paint everything black for a cohesive look. Both styles benefit from a contrasting hearth, lighter tile, natural stone, or even white painted wood, to ground the composition.
Industrial Black Metal and Concrete Accents
Industrial design thrives on raw materials and exposed structure. A black fireplace surround incorporating powder-coated steel or black-painted metal frames, combined with polished concrete or black concrete board, delivers urban authenticity.
One approach: pour or affix a black concrete accent panel (black pigment, polished or honed finish) as the main surround. Concrete is porous and must be sealed with a commercial-grade sealer to resist soot and heat. This is labor-intensive: consider hiring it out unless you have concrete experience.
Alternatively, frame the opening with flat-bar or angle-iron steel welded or bolted to a backing frame, then fill the surround with black brick, board-form concrete finish, or smooth black cement board. All steel should be powder-coated matte black and rated for heat exposure (standard interior coatings may discolor above 300–400°F). Metal accents look especially compelling when they’re left unpolished, the slight patina reads as intentional industrial rather than unfinished. Pair with a black concrete hearth (6″ depth is standard) or reclaimed industrial materials like slate or salvaged brick laid black-tinted mortar.
Black Fireplace Surround With Contrasting Materials
Pairing black with a striking opposite, white, warm wood, or natural stone, creates visual interest without abandoning the black aesthetic. A black surround with a white or light-wood mantel draws the eye upward and adds airiness to a bold base. A black tile or paint surround backing a natural-wood mantel and shelving combines warmth and sophistication, common in contemporary and Scandinavian-inspired homes.
One popular combination: black 3″ × 12″ subway tile in a running-bond pattern surrounding the firebox, with a natural wood or concrete mantel (walnut, oak, or Douglas fir, or a raw concrete shelf) mounted 42–48″ above the hearth. The contrast keeps the dark surround from feeling heavy. Alternatively, flanking the fireplace with built-in black cabinetry and shelving, while the surround itself remains neutral or white, anchors the entire wall and creates storage, a functional contrast to the raw black opening.
Resource guides like those on HGTV showcase renovation inspiration using contrast as a design principle. Another strategy: extend the black surround to the floor with a black hearth extension, then frame the entire composition with a lighter trim or wall color. This creates a “frame-within-a-frame” effect that feels intentional and layered. The key is balance, one dominant contrast, one subordinate one (e.g., black with white AND wood is busier than black with white alone).
DIY Installation Tips for Black Fireplace Surrounds
Before any installation, verify your local building codes. Some jurisdictions require non-combustible materials within 12″ of the firebox opening: others permit paint or certain tile over drywall if a heat-resistant backing is used. Confirm with your building department and your fireplace/stove manufacturer’s specifications.
Prep and Protection: Remove existing surround material carefully. Inspect the backing structure for fire safety compliance. For most projects, you’ll want a cement board or durock substrate directly behind the opening (3/8″ to 1/2″ thickness). Install it with corrosion-resistant fasteners. This step is non-negotiable for durability and safety. Always wear respiratory protection (N95 mask) when removing old tile or drywall, as silica dust is a real hazard.
Material Acclimation: Stone, tile, wood, and metal all respond to temperature and humidity changes. Let materials sit in the installation space for 24–48 hours before installation, unopened. This prevents warping, expansion, or contraction after the surround is complete.
Safety Gear: Wear safety glasses, heavy-duty work gloves, and ear protection if using power tools. If tile-cutting with a wet saw, ventilate well: if painting indoors, use low-VOC products and ensure airflow.
Common Mistake: Rushing surface prep. Uneven substrate, loose drywall, or inadequate backing leads to cracked tile, peeling paint, or warped wood. Sand, fill, and level everything before starting.
Heat Clearance: Never install combustible materials closer than the manufacturer specifies to active heat sources. If your fireplace runs hot, consult the manual. A thermal barrier or air gap (often required) must be maintained. Comprehensive how-to resources like The Spruce provide detailed step-by-step guides for common surround installations.
Conclusion
A black fireplace surround transforms a room with minimal aesthetic compromise and surprising versatility. Whether you choose minimalist paint, classic tile, rustic shiplap, or industrial metal, the key is respecting material properties, local codes, and prep work. Most surround projects are achievable for a motivated DIYer, though complex tile layouts, structural modifications, or concrete work may warrant a professional. Start with a clear design vision, source quality materials, and take your time, a fireplace surround lasts decades when done right.