Table of Contents
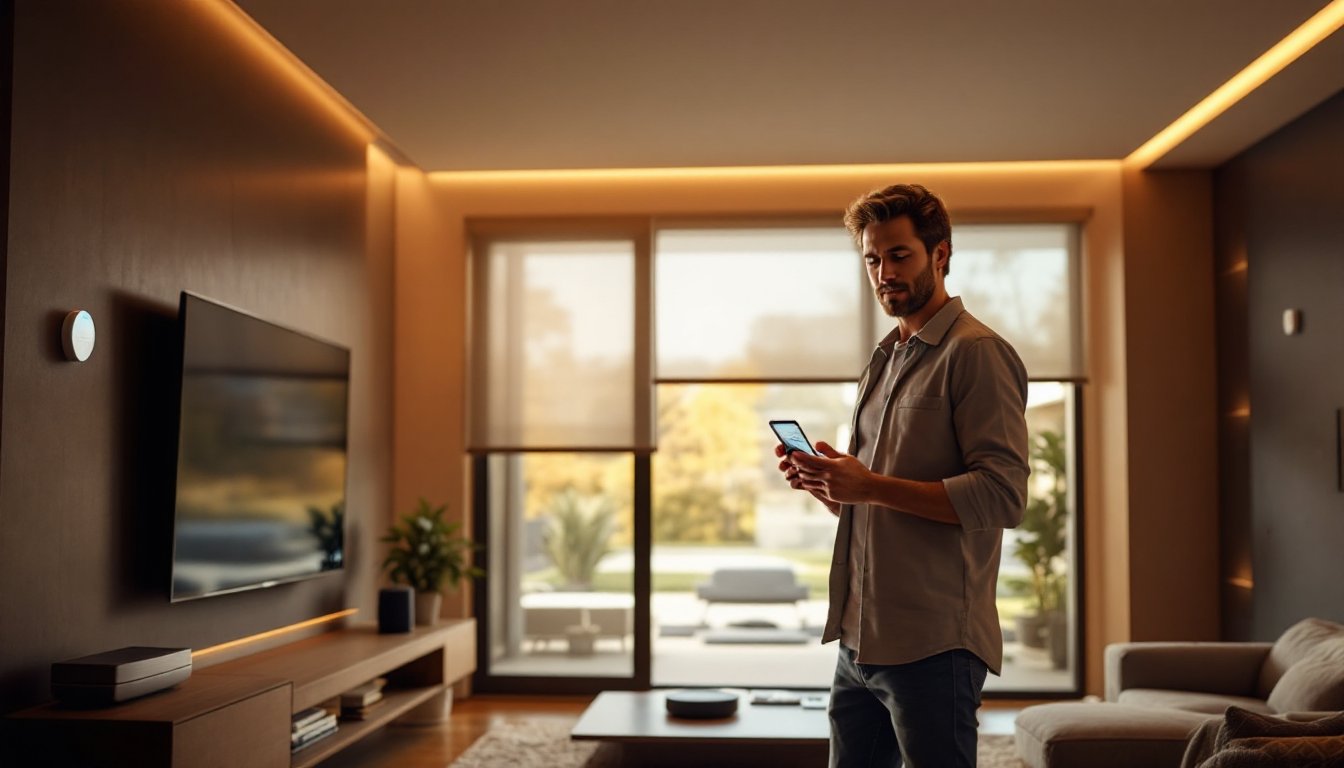
ToggleA home automation touch screen has become the command center for modern smart homes, replacing fumbling with multiple apps and voice commands. Whether you’re planning to retrofit an existing room or building a new space, a dedicated touch screen control panel simplifies everyday tasks, from adjusting lighting and temperature to managing security and entertainment. This guide walks you through what these devices are, the critical features to evaluate, and how to get one installed and running in your home.
Key Takeaways
- A home automation touch screen centralizes control of all smart home devices through a single, unified interface, eliminating the need to juggle multiple apps or voice commands.
- Display quality matters significantly—choose a 10-inch or larger screen with 1080p resolution and at least 400 nits brightness to ensure readability and encourage household adoption.
- Verify ecosystem compatibility with platforms like Amazon Alexa, Apple HomeKit, and Google Home before purchasing, and prioritize devices with built-in hubs supporting Zigbee and Z-Wave protocols.
- Proper installation requires careful location planning at eye level (48–60 inches from floor), dedicated electrical circuits, and reliable WiFi or hardwired ethernet connectivity.
- Professional installation costing $300–$800 is worth the investment if electrical work is involved, ensuring compliance with local codes and preventing installation mistakes.
- Create preset scenes matching your household routines, such as ‘Goodnight’ or ‘Movie Time,’ to maximize the convenience and usability of your home automation touch screen.
What Is A Home Automation Touch Screen?
A home automation touch screen is a wall-mounted or countertop display that centralizes control of smart home devices and systems. Instead of juggling multiple smartphone apps or barking voice commands across the room, homeowners interact with a single, unified interface to manage lighting, climate control, locks, cameras, blinds, and entertainment systems.
These devices come in various sizes, typically 7 to 15 inches, with most mounted at eye level on walls, much like traditional light switches but far more capable. Some popular options mentioned in reviews of the best smart displays include dedicated home automation hubs that function as both control panels and standalone smart displays.
Unlike a tablet you carry around, a permanent touch screen serves as the household’s always-accessible nerve center. It displays real-time information about your home’s status, weather, calendar events, and system alerts without requiring you to unlock a phone or tablet. The interface typically offers a grid layout of tiles or buttons, each controlling a different device or scene, a “Scene” being a preset combination of settings that execute multiple actions with a single tap (for example, “Goodnight” might dim lights, lock doors, and adjust the thermostat).
These screens run proprietary software or Android-based operating systems and connect to your home network via WiFi or hardwired ethernet. Most systems allow remote access through smartphone apps, so you can control your home from work or while traveling.
Key Features To Look For When Choosing A Touch Screen
Selecting the right touch screen requires evaluating several core features that directly impact usability and long-term satisfaction.
Display Quality And Size
Screen size matters more than you’d think. A 7-inch display works fine for a small apartment, but a household with multiple zones or family members often benefits from a 10-inch or larger screen to avoid excessive menu drilling. The actual usable area, accounting for bezels and status bar, determines how many controls fit on a single screen without scrolling.
Resolution and brightness are equally important. A 1080p display or better ensures icons and text remain crisp and readable from arm’s length, even in bright kitchens or sunrooms. Look for displays with 400 nits or higher brightness to remain legible in direct sunlight: anything below 300 nits will feel dim in well-lit spaces. Matte finishes reduce glare better than glossy screens, which is critical for a device you’ll glance at throughout the day.
Color accuracy matters too. Warm displays with good color saturation make the interface feel polished and encourage adoption by all household members. Poor colors or washed-out displays often lead to the device being ignored in favor of smartphone apps, defeating the whole purpose.
Response time should be snappy: touch input should register immediately without lag. Sluggish performance frustrates users, particularly in high-traffic kitchens where you’re managing multiple functions while cooking or transitioning between rooms.
Compatibility And Integration
The most beautiful touch screen is worthless if it doesn’t talk to your devices. Before purchasing, verify compatibility with the smart home platforms you already own or plan to use. Common ecosystems include Amazon Alexa, Apple HomeKit, Google Home, and proprietary platforms like SmartThings or Hubitat. Not all screens support all ecosystems equally: some work seamlessly with one platform but require workarounds for others.
Check protocol support, too. Most modern devices use WiFi, but some rely on Zigbee or Z-Wave radios that must be built into or paired with the touch screen’s hub. A dedicated home automation touch screen with a built-in hub (such as Brilliant Home Automation) can control Zigbee and Z-Wave devices directly without a separate bridge.
Future-proofing is also wise. Platforms that regularly update firmware and add integrations tend to outlive those with stagnant development. Research the manufacturer’s track record: Do they release new features quarterly, or has the product been dormant for years?
Installation flexibility matters too. Some units require hardwired power and network connections, while others run on batteries with WiFi only. Hardwired options are more reliable for a permanent household nerve center, but they demand professional installation in most cases. Battery-powered units offer flexibility but require periodic charging or battery replacement, which can be forgotten at inconvenient moments.
Installation And Setup Basics
Installing a home automation touch screen involves three main steps: planning the location, preparing power and network, and mounting the device.
Planning and location. Choose a spot in high-traffic areas, kitchens, hallways, and entryways are ideal. Avoid direct sunlight, which causes glare and can degrade the display over time. Mount at eye level, approximately 48 to 60 inches from the floor, so all household members can comfortably reach and view the screen without straining.
Power and network preparation. Hardwired touch screens require a dedicated 15-amp circuit with an outlet positioned behind the mounting location (or nearby, with cables run through walls). If that outlet doesn’t exist, you’ll need to run new electrical from your breaker panel, work that often requires a licensed electrician and a permit, depending on your jurisdiction.
Network connectivity is equally critical. A Luxury Home Automation setup demands reliable WiFi or ethernet. If using WiFi, position the router within reasonable range and test signal strength at the proposed mounting location before committing to installation. Hardwired ethernet is preferable for a stationary device: running cat-6 cabling during initial setup prevents connectivity hiccups later.
Mounting. Most touch screens ship with a wall-mounting bracket. Locate wall studs using a stud finder and secure the bracket with 3-inch wood screws into the studs for maximum stability, drywall anchors alone won’t support the weight reliably. If studs aren’t positioned conveniently, use heavy-duty toggle bolts or drywall anchors rated for 50 pounds or more.
Initial setup and programming. Once mounted and powered, follow the manufacturer’s on-screen setup wizard to connect to your network and create an account. Then, add and configure your smart devices one by one, testing each before moving to the next. Create scenes, preset combinations of actions like “Movie Time” (dim lights, close blinds, turn off kitchen lights), that match your household’s routines.
Consider whether Do It Yourself Home Automation is realistic for your comfort level. If you’ve never installed a wall-mounted device or aren’t comfortable running electrical work, hiring a technician saves frustration and ensures the installation meets local codes. The cost of professional installation (typically $300–$800) is worth the peace of mind if electrical work is involved.
Test the setup thoroughly before declaring it complete. Verify that all devices respond correctly from the touch screen, that scenes execute as expected, and that remote access (via smartphone app or web portal) functions properly. A day of troubleshooting now prevents weeks of annoyance later.
Conclusion
A home automation touch screen transforms how you interact with your home, delivering convenience and control from a single, always-accessible interface. By prioritizing display quality, verifying ecosystem compatibility, and planning installation carefully, including electrical and networking demands, you’ll choose and install a device that your household will actually use and enjoy for years. Take time to assess your current smart devices, measure your space, and honestly evaluate whether professional installation is necessary. The right touch screen becomes invisible in daily life, simply working as expected every single time you need it.